I've seen too many dogs in my grooming salon who tense up the moment their owner reaches for any kind of collar—not because the collar itself was painful, but because it was introduced wrong from the start. A puppy training collar can be an incredibly effective tool for teaching recall, boundary awareness, and focused attention, but only if your dog sees it as just another piece of equipment, not something to fear. In this guide, I'll walk you through the exact steps I use to introduce training collars to dogs of all ages and temperaments, drawing on nearly a decade of handling anxious, reactive, and brand-new puppies in my grooming shop. You'll learn how to build positive associations, recognize stress signals, and progress at your dog's pace—whether you're working with an 8-week-old puppy or an adult rescue who's never worn one before.
Skill level: Beginner-friendly
Time estimate: 1-2 weeks for full acclimation (5-10 minutes per session)
Applies to: Dogs of all ages (puppies 8 weeks+, adult dogs, seniors)

What You'll Need
- A properly fitted training collar (vibration, tone, or remote training collar—choose based on your training goals and dog's temperament)
- A flat buckle collar or harness (your dog's everyday gear, already familiar)
- High-value treats (small, soft, and irresistible—think boiled chicken, cheese, or freeze-dried liver; see how to use treats for puppy training for portion guidance)
- A quiet, low-distraction space for initial introductions
- Patience and a timer (to keep sessions short and prevent overload)
- Optional: a clicker or marker word if you're already using positive reinforcement training
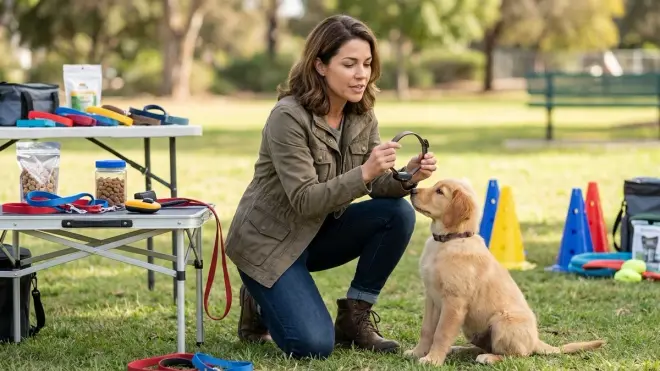
Step 1: Let Your Dog Investigate the Collar on Their Own Terms
Before the puppy training collar ever touches your dog's neck, let them examine it like any other new object. I do this with every piece of grooming equipment—clippers, brushes, even nail grinders—because a dog who's allowed to sniff and explore something unfamiliar is far less likely to startle when you actually use it.
Set the collar on the floor or hold it in your open palm. Let your dog approach at their own pace. Some dogs will give it a quick sniff and move on; others (especially curious puppies) might paw at it or mouth it gently. That's fine. What you're watching for is no fear response—no backing away, tucking the tail, or pinned ears.
Reward any calm interaction. If your dog sniffs the collar, mark that moment with "yes!" or a click and immediately offer a treat. Do this three or four times in a row. You're building the foundation: this thing = good stuff happens.
One of my rescues, a terrier mix who came to me with serious handling anxiety, needed two full days of this step before he'd even approach the collar without slinking backward. I left it on the living room floor, tossed treats near it during mealtimes, and let him decide when he was ready. Rushing this stage is how you create a dog who bolts when you reach for training gear.
Step 2: Pair the Collar with Something Your Dog Already Loves
Now we're layering positive associations. I want your dog to start thinking, oh, THAT thing shows up right before [favorite activity]. This is the same principle I use when introducing anxious dogs to the grooming table—I pair the table with treats, praise, and calm touch until the table itself becomes a predictor of good things.
For the next few days, show your dog the training collar right before meals, walks, play sessions, or any activity they already get excited about. Hold the collar in one hand, let them see it and sniff it, then immediately do the thing they love. You're not putting it on yet—just creating a visual connection.
If you're working with a puppy, this step is usually fast. Puppies are like little sponges for new associations. If you're working with an adult dog who's had negative experiences with collars (or who's just naturally cautious), give this step extra time. My senior shepherd needed almost a week of seeing the collar before walks before she stopped giving me the side-eye when I picked it up.
Pro variation for multi-dog households: If you have multiple dogs like I do, introduce the collar to each dog individually first. Don't let one dog's enthusiasm (or fear) influence another's initial impression.
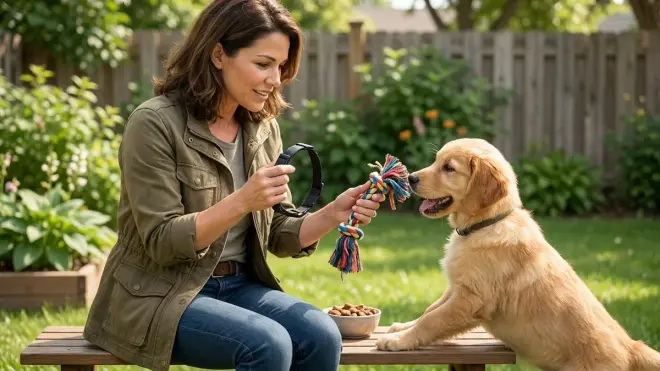
Step 3: Practice the Motion of Putting It On (Without Actually Fastening It)
This is where most people skip ahead and end up with a dog who ducks or backs away during collar time. I learned this lesson the hard way with nervous grooming clients—if a dog isn't comfortable with the approach of a tool, they'll never relax once it's in place.
Sit with your dog in a calm space. Hold the collar open as if you're about to put it on, but instead of slipping it over their head, just bring it close to their neck, pause for a second, then pull it away and reward them with a treat. Do this five or six times in a row.
You're desensitizing them to the motion—the hand reaching toward their head, the collar approaching their personal space. Some dogs are totally fine with this immediately. Others (especially dogs who've been grabbed by the collar in the past or have had bad grooming experiences) will flinch or pull back. If that happens, slow down. Bring the collar only as close as your dog can handle without tension, reward that, then end the session.
Over the next few sessions, gradually bring the collar closer until you can touch it to their neck without them moving away. Then progress to slipping it loosely over their head (not fastened, not snug—just resting). Treat immediately, then remove it. Repeat until your dog stays relaxed through the whole motion.
I do this exact sequence with nail clippers for anxious dogs. It feels slow, but it works.
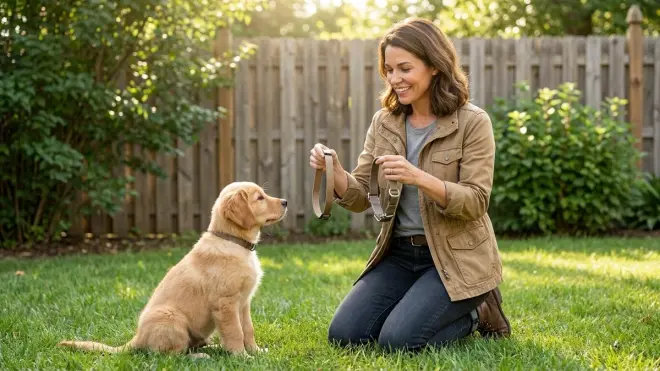
Step 4: Put the Collar On for the First Time (During Positive Experiences)
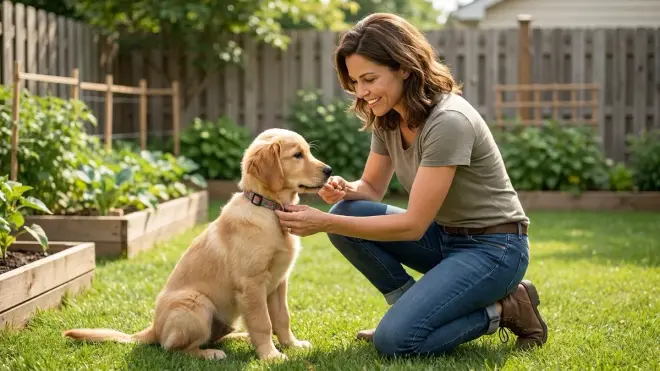
Now you're ready to actually fasten the collar. Choose a moment when your dog is already happy and engaged—right before a walk, during a training session with treats, or while they're chewing a favorite toy.
Slip the puppy training collar on and fasten it loosely (you should be able to fit two fingers comfortably between the collar and your dog's neck—proper fit is critical for both safety and effectiveness, as outlined in our dog training collar safety checklist). Immediately follow with high-value treats, play, or whatever your dog finds most rewarding. Keep the collar on for just 2-3 minutes this first time.
Watch your dog's body language closely. Are they scratching at it? Freezing? Shaking their head? If yes, the collar might be too tight, or they need more time getting used to the sensation. Remove it calmly (no fuss, no soothing talk—that can accidentally reinforce anxiety) and go back to Step 3 for another day or two.
If your dog ignores the collar and keeps doing what they were doing, perfect. That's exactly what you want. Remove the collar after a few minutes, reward again, and call it a session.
For the first week, only put the collar on during short, positive experiences. I kept my terrier's training collar associated exclusively with backyard fetch sessions for ten days straight before I ever used it for actual training. By the time we started working on recall, he was wagging the moment I picked it up.
Step 5: Gradually Increase Wearing Time (Without Activating Features Yet)
Once your dog is comfortable with the collar going on and off, start extending how long they wear it. Put it on during a 10-minute training session. Then a 20-minute walk. Then while you're preparing their meal. The goal is to make the collar feel like background—just another thing they wear sometimes, like their regular collar.
Important: During this entire step, do not activate any of the collar's features (vibration, tone, or stimulation). You're still just building comfort with the physical presence of the collar. I see people rush this and wonder why their dog shuts down the first time the collar beeps—it's because they never separated "wearing the collar" from "collar does something."
If you're working with a puppy under six months, keep wearing sessions short (15-20 minutes max) and always supervise. Puppies are more likely to chew on collar straps or get the unit caught on something. My youngest rescue managed to hook his training collar receiver on a chair leg within five minutes—I don't leave collars on unsupervised anymore.
Adult dogs can typically handle longer sessions, but watch for any rubbing or irritation, especially if your dog has a thick coat or sensitive skin. I rotate collar placement slightly (keeping it high on the neck where it's designed to sit, but varying the exact spot) to prevent any pressure points.
Step 6: Introduce the Collar's Functions Gradually and Pair With Rewards
This is where we actually start using the training collar as intended, but we're still building positive associations with each feature. Most modern training collars offer multiple levels of vibration, tone signals, or stimulation. We're going to introduce these one at a time, starting with the mildest setting.
For vibration or tone collars: Put the collar on your dog during a calm moment. Have treats ready in your hand. Activate the vibration or tone at the lowest setting for just a split second, then immediately treat. Your dog might startle slightly the first time—that's normal. What matters is that the surprise is immediately followed by something good.
Repeat this pairing 10-15 times over several sessions: vibration/tone → treat. You're teaching your dog that the sensation or sound predicts a reward. Once your dog shows no stress response (and ideally starts looking at you expectantly when they feel/hear it), you can begin using it as a marker or attention cue during actual training.
For remote training collars with stimulation: Start at the absolute lowest level your dog can perceive (many dogs won't even notice the first few levels). The stimulation should look like a mild ear flick—a brief "huh?" moment, not discomfort. Pair it with treats exactly as above. If your dog yelps, freezes, or shows any fear response, the level is too high or they need more time with the previous steps.
I want to be clear: I've seen training collars used effectively for off-leash reliability and behavior interruption, but I've also groomed dogs who were ruined by improper use. If you're not absolutely confident in reading your dog's stress signals or adjusting stimulation levels, work with a certified professional trainer who uses balanced methods. This isn't the time for guesswork.
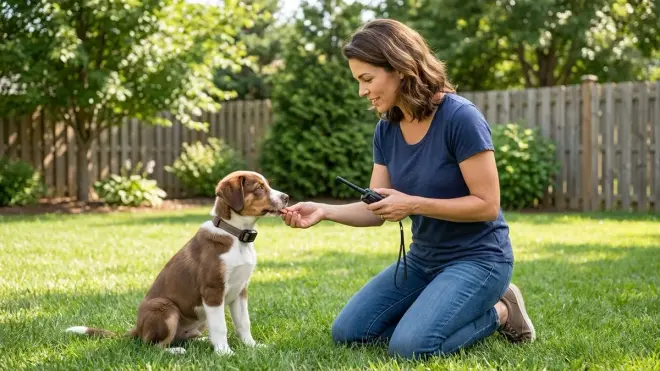
Step 7: Integrate the Collar Into Actual Training Scenarios
Now your dog is comfortable wearing the collar and understands that its functions (whether vibration, tone, or mild stimulation) can be pleasant or neutral. You can begin using the collar as it's designed: to reinforce recall, mark behaviors at a distance, or interrupt unwanted actions.
Key principle: The collar should never be the first tool you reach for in training. It works best when layered on top of a foundation of positive reinforcement. If your dog doesn't know basic commands with treats and praise first, a training collar won't magically teach them.
Here's how I integrate it for recall training (the most common use): I start in a low-distraction environment. I call my dog using our usual recall cue ("come!"). The moment they turn toward me, I give a quick vibration or tone from the collar (as a marker, like a clicker), then reward heavily when they reach me. Over many repetitions, the collar's signal becomes another way to say "yes, that's exactly what I wanted—come get your reward."
For boundary training or interrupting behaviors (like chasing wildlife), the collar provides a way to communicate at distances where your voice might not reach or your dog is too amped to hear you. But this only works if your dog already sees the collar's signals as meaningful information, not punishment.
One of my dogs, a high-energy terrier mix, learned "come" with treats at home but would blow me off completely at the dog park. Once I added a vibration collar as a distance marker, his recall became reliable even with squirrels around—because the vibration meant "that recall cue you just heard? I really mean it, and there's a reward waiting."
Step 8: Maintain Positive Associations and Monitor for Stress

Even after your dog is fully trained and working reliably with the collar, continue checking in on their emotional response. I've seen dogs who were fine with a training collar for months suddenly develop anxiety because their owner started using it only for corrections, never for positive interactions.
Every few training sessions, do a "reset" session: put the collar on, do some easy, fun behaviors your dog already knows well, use the collar's marker signal, and reward generously. This keeps the collar associated with success and good things, not just difficult or stressful work.
Watch for these stress signals:
- Freezing or shutting down when the collar comes out
- Excessive scratching at the collar during wear
- Avoiding you when you're holding the collar
- Reluctance to engage in training that used to be fun
If you see any of these, take a break from the collar for a few days and go back to purely reward-based training. Then reintroduce it slowly, starting back at Step 2 or 3. It's not a setback—it's information that you need to rebuild the association.
I also rotate training tools regularly. My dogs work with flat collars, harnesses, long lines, and training collars depending on the context. No single piece of equipment is used exclusively for "serious" work or corrections, which keeps everything emotionally neutral.
Pro Tips & Common Mistakes
Don't skip the desensitization steps. I know two weeks of prep sounds excessive when you're eager to start training, but I've watched that rush backfire more times than I can count. A dog who's afraid of their training collar will never learn effectively with it—they'll just learn to fear training.
Use the collar as part of a balanced approach, not as a shortcut. The most effective training I've seen combines positive reinforcement (treats, praise, play) with clear communication tools like training collars. If you're using the collar instead of treats and relationship-building, you're missing the point. For comprehensive guidance on effective training tools, see our complete guide to dog training aids.
Fit matters more than you think. A loose collar won't deliver consistent signals; a too-tight collar can cause physical discomfort and make your dog hate wearing it. The collar should sit high on the neck (just behind the ears), snug enough that it doesn't slide around, but loose enough for two fingers to fit underneath. I adjust fit every few weeks, especially with growing puppies.
Common mistake: using the training collar for everyday wear. These collars are training tools, not 24/7 gear. I remove them after training sessions or walks. Leaving them on constantly increases the risk of skin irritation, reduces their effectiveness as a training signal, and can create negative associations if your dog gets corrected for random things while wearing it.
Another mistake: assuming one introduction approach works for all dogs. My senior shepherd needed three weeks of slow introduction because she's naturally cautious. My terrier mix was ready in five days because he's bold and food-motivated. Your timeline depends entirely on your individual dog's temperament, history, and confidence level.
Frequently Asked Questions
Can I use a puppy training collar on an 8-week-old puppy?
You can introduce the collar itself to puppies as young as 8 weeks old using the desensitization steps in this guide, but most veterinarians and trainers recommend waiting until at least 4-6 months before activating any vibration or stimulation features, and only if basic positive reinforcement training has already been established. Very young puppies are still developing physically and emotionally, and their primary learning should come through treats, play, and relationship-building. If you do introduce a collar early, use it only as a passive object paired with rewards—never activate its features until your puppy is older and has solid foundational training.
How do I know if my dog is stressed by the training collar or just adjusting to something new?
Brief, minor signs of adjustment (like scratching at the collar once or twice in the first wearing, or a quick head shake) are normal and usually resolve within a few minutes as your dog gets used to the sensation. Stress signals that indicate you need to slow down include persistent scratching, freezing in place, tucking the tail, pinned ears, refusing treats they'd normally take, or avoiding you when you pick up the collar. If you see these behaviors, remove the collar calmly and return to earlier steps—let your dog investigate it without wearing it, pair it with high-value rewards again, and progress more slowly over several more days before attempting to put it on again.
Should I leave the training collar on my dog all day to help them get used to it faster?
No—training collars should only be worn during active training sessions or supervised activities, typically for no more than a few hours at a time. Leaving the collar on constantly can cause skin irritation or pressure sores (especially if your dog is active or has a thick coat), and it also dilutes the collar's effectiveness as a training signal because your dog stops associating it with focused work. Think of it like I think of grooming tools: I don't leave clippers running near a nervous dog all day to "get them used to the sound"—I introduce them in short, positive sessions and then put them away so the experience stays meaningful and manageable.
What's the difference between a puppy training collar and a regular collar, and when should I use each?
A regular flat buckle collar or harness is for everyday wear, identification tags, leash attachment during casual walks, and general management—it's passive equipment that doesn't communicate or deliver signals. A puppy training collar (whether vibration, tone, or remote training style) is an active communication tool designed to deliver specific signals (like a marker tone or attention cue) at a distance or in situations where verbal cues aren't effective, and it's only used during structured training sessions. You should use your regular collar for daily life and attach the training collar only when you're actively working on specific behaviors like recall, boundary training, or distance commands—then remove it when the session ends so it maintains its meaning as a training context signal.
Summary
Introducing a puppy training collar the right way—slowly, positively, and at your dog's pace—makes the difference between a tool that strengthens your communication and one that creates fear. I've spent years watching dogs respond to equipment, and the ones who excel are always the ones whose owners took the time to build comfort first, functionality second. Start by letting your dog investigate the collar without pressure, pair it relentlessly with rewards and favorite activities, practice the motions before the reality, and only activate features once wearing the collar is completely neutral. Whether you're working with an 8-week-old puppy or a middle-aged rescue, these steps work because they respect how dogs actually learn—through positive associations, clear communication, and trust. The training collar isn't magic, but used thoughtfully, it becomes just another way you and your dog understand each other.