
I'll be honest—when I brought home my first dog about eight years ago (between tank builds, naturally), I thought training would be as straightforward as maintaining water parameters in my reef tank. Turns out, living creatures with personalities are a whole different challenge than keeping ammonia levels stable. That first week was humbling, filled with confusion on both sides, but it taught me something crucial: how to train a new dog first week isn't about perfection—it's about building a foundation of trust and communication that everything else grows from.
Whether you've adopted a playful eight-week-old puppy, a six-month-old adolescent with some bad habits, or an adult dog from a shelter, this guide walks you through the essential commands and techniques that'll set you both up for success. We're focusing on dogs of all ages here, though I'll note where puppies need different approaches than adult dogs. In my experience, that first week determines whether you'll spend the next year fighting battles or building a partnership, and I want to help you get it right from day one.

This is beginner-friendly content—you don't need prior training experience, just patience, consistency, and about 15-20 minutes of focused practice time spread throughout each day.
What You'll Need
Before you start working on how to train a new dog first week, gather these essentials:
- High-value training treats (small, soft pieces no larger than a pea—chicken, cheese, or commercial training treats like Zuke's Mini Naturals Training Treats)
- Standard 6-foot leash (not retractable—you need control during training)
- Properly fitted collar or harness (should fit snugly but allow two fingers underneath)
- Quiet training space (inside your home initially, away from distractions)
- Treat pouch or pocket (quick access matters when timing is everything)
- Patience and realistic expectations (some dogs pick up commands in one session, others need fifty repetitions)
- Optional: clicker (I didn't use one with my first dog and did fine, but many trainers swear by them for marking precise moments)
- Calm energy (dogs read your frustration like I read pH test results—instantly and accurately)
You'll also want to review advice for new dog owners before your new companion arrives, and make sure you've completed your first vet visit checklist for new dogs to rule out any health issues that might affect training.
Step 1: Establish Name Recognition Before Anything Else
This isn't technically a command, but it's the foundation everything else builds on, and in my experience, people skip it way too often. Your dog needs to associate their name with positive attention and the expectation that something good happens when they hear it.
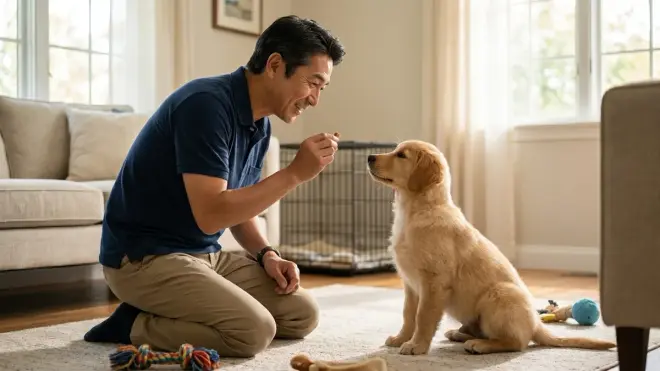
Start in a quiet room with zero distractions. Say your dog's name once in a cheerful, upbeat tone. The moment—and I mean the instant—they look at you, mark it with "yes!" or a clicker, then immediately give them a treat. Don't wait for them to come over or do anything else. Just eye contact earns the reward.
Repeat this 10-15 times per session, three or four sessions throughout the day. What I've found works beautifully is varying where you are in the room—sometimes close, sometimes across the space—so they learn to orient to you regardless of distance. Within two or three days, most dogs will snap their attention to you the moment they hear their name, which becomes the entry point for every other command you'll teach.
For puppies under four months, keep sessions shorter—maybe 5-7 repetitions—because their attention spans are roughly equivalent to goldfish (and yes, I know goldfish actually have decent memory, but you get the point). Adult dogs, especially those from shelters, might take longer if they're used to hearing their name associated with negative experiences or if they're learning a new name entirely.
Avoid these mistakes: Don't repeat the name multiple times if they don't respond immediately. That teaches them they can ignore it. Say it once, wait three seconds, and if nothing happens, move closer and try again. Never use their name when you're angry or about to do something they dislike—that poisons the association faster than copper in a reef tank.
Step 2: Teach "Sit" as Your Primary Foundation Command
"Sit" becomes your dog's default behavior when they're unsure what to do, and it's the easiest command to teach because most dogs naturally sit throughout the day anyway. You're just putting a word to an action they already know.
Hold a treat close to your dog's nose—close enough they can smell it but not snatch it. Slowly move the treat up and back over their head, toward their tail. As their nose follows the treat upward, their rear end will naturally lower to the ground. The moment their bottom touches down, say "yes!" and give them the treat plus enthusiastic praise.
After 5-10 successful repetitions where you're luring them into position, start adding the verbal cue. Say "sit" just as you begin moving the treat backward. Within a session or two, most dogs connect the word with the action. Then you can gradually reduce the hand motion, eventually using just the verbal command.
What I've found works incredibly well is capturing natural sits throughout the day. Any time you notice your dog sitting on their own—maybe while waiting for dinner or watching you—immediately say "sit," mark it with praise, and give a treat. This reinforces that the position itself, regardless of how they got there, earns rewards.
For large breed puppies (check out best puppy food for large breeds if you haven't already optimized their nutrition), be patient—their rear ends take a bit longer to coordinate than smaller breeds. Adult dogs from shelters might already know this one, but use your first week to establish that you're the one they take cues from now.
Step 3: Introduce "Come" in a Controlled Environment
"Come" (or "here") is arguably the most important safety command you'll ever teach, but it's also where I see people make the biggest mistakes early on. During your first week training a new dog, you need to set this up for success by keeping it simple and always positive.
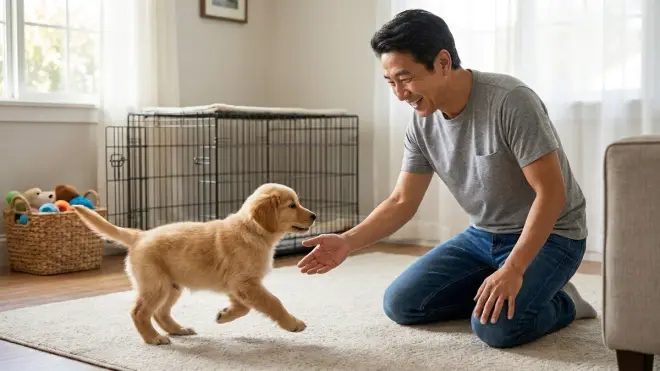
Start with your dog on a leash in a hallway or small room—somewhere they can't get distracted or wander off. Get down to their level (which feels silly but works incredibly well), say their name followed by "come" in an excited, happy voice, and gently reel in the leash while patting your legs or backing up a few steps. When they reach you, throw a party—multiple treats, enthusiastic praise, the whole celebration.
The key here is making yourself more interesting than anything else in the environment. I learned this the hard way when my dog discovered a fascinating smell during practice and completely ignored me. Now I make sure I'm using higher-value treats than usual—real chicken or cheese, not the regular kibble—and I practice when the dog is already somewhat focused on me, not when they're investigating the interesting corner of the room.
Practice this 8-10 times per session, twice daily. Gradually increase the distance (still on leash) and add mild distractions like a toy on the floor or family member walking past. By the end of week one, your dog should reliably come to you in low-distraction environments.
Critical rule: Never, ever call your dog to come and then do something unpleasant like nail trimming, giving medication, or ending playtime. That teaches them "come" means fun stops. If you need them for something they dislike, go get them instead. And as tempting as it is, don't practice recall off-leash yet—that's week three or four material, once the behavior is absolutely solid.
Step 4: Build "Down" Through Patient Shaping
"Down" is trickier than sit because it requires your dog to put themselves in a vulnerable position, and some dogs—especially confident or nervous ones—resist it initially. That's completely normal. In my experience, this command takes the longest to solidify during the first week, and that's okay.
Start with your dog in a sitting position. Hold a treat in your closed fist and let them sniff it. Slowly lower your hand straight down to the floor, right between their front paws. Most dogs will follow the treat down with their nose, and as they stretch downward, their elbows will often bend and they'll slide into a down position. The instant they're fully down—chest and belly on the ground—say "yes!" and release the treat.
Some dogs (and I've dealt with this) just stand up instead of lying down, following your hand like they're playing a game. If that happens, try creating an "L" shape with your hand—down to the floor, then slowly outward away from them. That often encourages the down position. Another trick is putting your hand with the treat under your bent knee or a low coffee table, creating a space they have to duck under to reach the reward.
What I've found works when dogs are really resistant is capturing natural downs. Watch for moments when your dog lies down on their own—early morning, after play sessions—and immediately mark it with "down," praise, and a treat. Do this consistently for a day or two, and they'll start understanding what position you're asking for.
For puppies and adolescent dogs (under 18 months), this command might take the full week or longer to become reliable, and that's fine. Adult dogs often pick it up faster, especially if they've had any prior training. Don't force them down by pushing—that breaks trust faster than anything.
Step 5: Practice "Stay" with Extremely Short Durations

"Stay" teaches impulse control and patience, both of which are essential for a well-behaved dog, but it's also where people expect too much too soon. During the first week of training a new dog, you're shooting for three-second stays, not three-minute ones.
Put your dog in a sit or down position. Hold your palm up in a "stop" gesture about six inches from their nose and say "stay" in a calm, quiet voice—not excited like your other commands. Take one small step backward. If your dog stays in position for even two seconds, immediately step back to them (don't call them to you—that contradicts the stay), say "yes!" and reward with a treat and praise.
The most common mistake here is increasing duration or distance too quickly. I did this with my dog and ended up confusing him completely, basically teaching him that "stay" meant "probably stay, maybe." Instead, repeat the same short duration—two to three seconds, one step away—until your dog is successful 8 out of 10 times. Only then do you add one more second or one more step. Never both at once.
Important distinction: "Stay" means don't move until I release you with a specific word like "okay" or "free." Make sure you use a release word consistently so your dog knows when the exercise is over. Without that, they're just guessing when they're allowed to move.
For puppies under six months, stay expectations should be incredibly modest—three seconds is genuinely impressive. Adult dogs, especially calmer breeds or individuals, might progress faster, but don't assume. Some adult rescue dogs have never learned self-control commands and need the same patient building blocks as puppies. By the end of your first week, if your dog can hold a stay for five seconds while you're two steps away, you're doing great.
Step 6: Introduce "Leave It" to Build Impulse Control
"Leave it" is the command that'll save your dog's life someday when they're sniffing something dangerous on a walk, and it's surprisingly easy to teach early on. This is your first week teaching your dog they can earn better rewards by ignoring something tempting, which is a foundational concept for all future training.
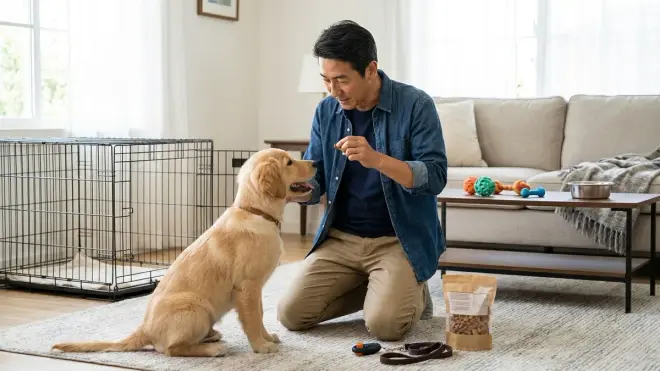
Hold a low-value treat in your closed fist and let your dog sniff, lick, and paw at your hand. Just wait them out without saying anything. Eventually—and this might take 30 seconds the first time—they'll get frustrated and back away or look at you. The instant they stop trying to get the treat, say "yes!" and give them a different, higher-value treat from your other hand.
Repeat this until your dog automatically looks at you instead of fussing with your closed hand. Then add the verbal cue: say "leave it" as you present the closed fist. Practice 5-8 repetitions per session.
Once they've got the concept down with your closed hand, level up by placing a treat on the floor and covering it with your hand. Say "leave it" and wait for your dog to back off or make eye contact with you. Reward from your pocket, not by giving them the floor treat—that would teach them "leave it" means "wait and you'll eventually get this thing," which is the opposite of what you want.
What I've found incredibly useful is practicing this command with real-life distractions—a toy on the floor, a piece of food dropped during meal prep, their leash before a walk. The more contexts they practice in during this first week, the more generalized the behavior becomes.
For puppies with limited impulse control, this will be challenging, and you'll need shorter sessions with easier scenarios. Adult dogs often pick this up quickly, though dogs with resource guarding issues might need professional guidance beyond what I can offer here.
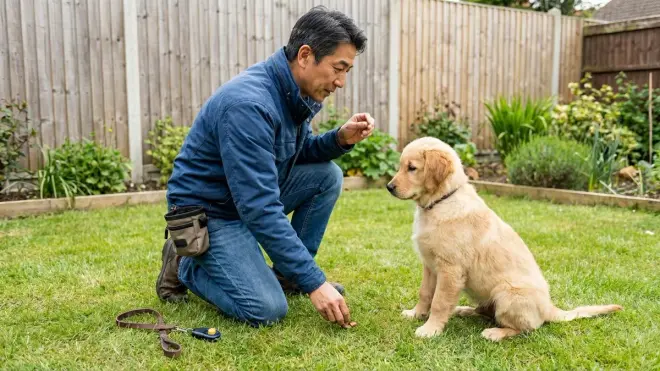
Step 7: Establish a "Go Potty" Cue If You're House Training
If you're working with a puppy or an adult dog who isn't house-trained, adding a bathroom cue during your first week is one of those small things that pays enormous dividends later. It lets you trigger elimination on cue, which is invaluable before car rides, bedtime, or any situation where you need them to go right now.
This isn't a command you teach through luring or shaping—it's purely association-based. Every single time you take your dog outside for a bathroom break, bring them to the designated spot and wait quietly. The moment they start eliminating, say your chosen phrase—"go potty," "do your business," "hurry up," whatever feels natural to you. Say it gently and repeatedly while they're in the act.
When they finish, immediately throw a celebration—enthusiastic praise, treats, the whole production. In my experience, most people forget the reward part, treating successful bathroom breaks as expected rather than praiseworthy, but during this first week especially, you want your dog to understand that eliminating in the right place is the best decision they could possibly make.
After 5-7 days of consistent pairing—the phrase during the act, followed by celebration—many dogs will start to associate the words with the action and will begin eliminating when they hear the cue, even if they weren't quite ready yet. This doesn't mean you can skip regular bathroom schedules or ignore body language, but it becomes a useful tool in your training toolkit.
For timing guidance and additional house-training support, check out dog potty training aids and consider products like NatureVet Potty Here Training Aid Spray for scent-marking your designated bathroom area.
Puppies under four months need bathroom breaks every 2-3 hours minimum, while adult dogs can typically hold it longer but still need frequent opportunities during the first week as they learn your household routine.
Pro Tips & Common Mistakes to Avoid
The biggest mistake I see people make when learning how to train a new dog first week is inconsistency—using different words for the same command, rewarding sometimes but not others, or having family members with completely different rules. Dogs learn patterns, and if the pattern keeps changing, they simply stop trying to figure it out.
What I've found works: Pick your command words on day one and make sure everyone in the household uses exactly the same ones. "Come," "here," and "come here" are three different commands to your dog. Write them down if you need to. Same goes for release words, hand signals, everything.
Timing is everything. Rewards need to happen within one second of the desired behavior—not after your dog sits, then stands, then spins around. That's why I keep treats in my pocket constantly during the first week, even when I'm not actively training. You'll capture so many spontaneous good behaviors if you're ready to reward them instantly.
Don't train when you're frustrated or in a hurry. Your dog reads your energy better than you realize, and they'll associate training with your stress, which poisons the whole experience. If you're having a bad day or you're late for something, skip the session. Fifteen minutes of focused, positive training beats an hour of distracted, irritable work every single time.
Common mistake I made personally: Training for too long. After about 10-15 minutes, my dog's attention was fried and we were both just going through motions. Short sessions—even just five minutes—multiple times throughout the day work infinitely better than one long marathon. Think of it like water changes in an aquarium: consistent small efforts beat occasional massive overhauls.
Keep distractions minimal during week one. I know it's tempting to show off your dog's new "sit" command at the dog park, but that's setting them up for failure. Master commands in your quiet living room first, then your backyard, then progressively more distracting environments over the following weeks.
And here's something that took me embarrassingly long to figure out: how many treats can I give my puppy during training matters. I was giving such large treats that my dog filled up after just a few repetitions. Switch to tiny pieces—the size of a pea or smaller—so you can do dozens of repetitions without impacting their regular meals or causing weight gain.
Frequently Asked Questions
How long should I train my new dog each day during the first week?
Aim for three to five short training sessions daily, each lasting 5-10 minutes for adult dogs and 3-5 minutes for puppies under six months. Your dog learns more effectively through multiple brief sessions spaced throughout the day rather than one long marathon session, because they retain information better when they're mentally fresh and engaged. Always end sessions on a positive note, even if that means going back to an easier command they've already mastered, and avoid training when your dog is overtired, overstimulated, or right after meals.
Should I use the same training methods for puppies and adult dogs during the first week?
The core positive reinforcement methods remain the same—rewarding desired behaviors with treats, praise, and play—but you'll need to adjust your expectations and session lengths based on age. Puppies under four months have shorter attention spans, need more frequent bathroom breaks during training, require smaller treat sizes (to avoid overfeeding), and generally need 2-3 times as many repetitions to learn the same command compared to adult dogs. Adult dogs typically have better focus and impulse control but may carry baggage from previous training (good or bad) and might need extra time to trust you if they're from shelters or rescue situations, so patience matters regardless of age.
Can I train my new dog if they're still adjusting to my home and seem nervous?
Yes, but modify your approach to prioritize building trust before demanding obedience, and keep sessions extremely short and pressure-free. Focus primarily on name recognition and voluntary engagement—rewarding your dog any time they choose to approach you, make eye contact, or show interest in interacting—rather than drilling formal commands during the first few days. According to the 3-3-3 rule for rescue dogs, dogs need time to decompress after rehoming, and pushing training too hard too soon can actually slow progress by overwhelming an already stressed animal. Watch your dog's body language closely: if they're showing stress signals like excessive panting, yawning, lip-licking, or avoiding eye contact, back off and give them space.
What if my new dog already knows some commands but ignores me?
This usually means the dog is testing whether you will enforce the behaviors their previous owner taught, or they've learned that commands are optional suggestions rather than consistent expectations. Start from scratch as if they don't know anything, using the same methods outlined in this guide, which re-establishes that specific words mean specific actions and that you're the source of rewards. Most dogs quickly realize "oh, this new person also uses that word, and good things happen when I respond" and fall back into previous training within a few days. If the dog consistently responds to commands for other family members but not you, you likely need to spend more time on relationship building through play, hand-feeding meals, and positive interactions before drilling obedience work.
Building Your Foundation For Long-Term Success
That first week goes by faster than you'd expect, filled with small victories, a few setbacks, and countless moments where you'll wonder if you're doing it right. What I've learned through training my own dog—and watching friends work with theirs—is that perfection isn't the goal here. Consistency, patience, and building positive associations are what matter when you learn how to train a new dog first week.
By the end of these seven days, your dog should reliably respond to their name, sit on cue in low-distraction environments, and understand the beginnings of come, down, stay, and leave it. Some dogs will pick up all of these quickly; others will master two commands really well and still be figuring out the rest. Both scenarios are completely normal. Check out puppy training tools and dog training aids as you continue beyond this foundational week.
The real measure of success isn't how many commands your dog knows—it's whether they're watching you with interest, engaging willingly, and starting to understand that communication between you two goes both ways. Everything else builds from there.