I've spent nearly a decade grooming dogs, but I'll be honest—cats are a different game entirely. When my neighbor begged me to help trim her Persian's nails after three bleeding attempts, I learned how to trim cat nails without getting scratched through trial, research, and a few strategic Band-Aids. The key isn't restraint or speed; it's understanding feline body language and working with their natural behaviors instead of against them.
In this guide, I'll walk you through seven vet-approved techniques that transform nail trimming from a wrestling match into a manageable routine. These methods work for cats of all ages—from anxious kittens to senior cats with arthritis—and they focus on desensitization, positioning, and timing rather than brute force. Most nail trims take 5-10 minutes once your cat is acclimated, though the conditioning process may take 1-2 weeks. You'll learn everything from proper restraint techniques to reading subtle stress signals that tell you when to pause.
What You'll Need
Before you start learning how to trim cat nails without getting scratched, gather these essentials:
- Cat-specific nail clippers: Scissor-style or guillotine-style work; avoid dog clippers that are too large. The Best Cat Nail Clippers for Beginners: 8 Safe & Easy-to-Use Options breaks down the differences if you're starting from scratch.
- Styptic powder or cornstarch: For quick bleeding control if you accidentally cut the quick
- High-value treats: Small, soft pieces your cat actually gets excited about—not their regular kibble
- Towel or blanket: For the "burrito wrap" technique (100% cotton or fleece, 24"x36" minimum)
- Good lighting: Natural daylight or a bright LED lamp to see the quick clearly
- Nail file or grinder (optional): For smoothing sharp edges after trimming
- Helper (sometimes): A calm second person for particularly anxious cats, though solo trimming is often easier
Step 1: Condition Your Cat to Paw Handling Over 5-7 Days
The biggest mistake I see is trying to trim nails on day one. Cats need gradual desensitization to paw handling before you introduce clippers.
Start by simply touching your cat's paws during calm moments—while they're lounging in your lap or dozing in their favorite spot. Gently press the paw pad to extend the nails, hold for two seconds, then immediately offer a treat. Do this once or twice per paw, then stop completely. You're building a positive association: paw touch = treat.
Over the next few days, increase the duration. Press the pad longer, hold individual toes, and introduce the sound of the clippers snapping near (but not on) your cat. Keep sessions under two minutes. The moment your cat tenses, flattens their ears, or pulls away, you've pushed too far—back up a step.
I learned this lesson with my neighbor's Persian. The first three days, I just sat next to him while he ate, occasionally touching his front paws. By day five, he let me hold each paw for ten seconds without flinching. That foundation made the actual trim effortless.
Watch for signs your cat is ready: relaxed body language, purring or contentment during paw touches, and no attempt to flee when you pick up their foot. If they're still twitchy after a week, give it more time. Rushing this stage is how you end up scratched.
Step 2: Choose the Right Time and Environment

Timing is everything when learning how to trim cat nails without getting scratched. Never attempt this when your cat is wound up from play, hungry before dinner, or in high-traffic areas of your home.
The ideal window is post-meal or after a play session, when your cat is naturally drowsy. I trim nails right after breakfast in my quietest room—no TV, no dogs wandering through, just calm and boring. Cats are crepuscular (most active at dawn and dusk), so mid-morning or early afternoon works best for most.
Set up in a small, enclosed space where your cat can't bolt and hide under furniture. A bathroom with the door closed works perfectly. Position yourself on the floor or a low chair with your cat on a non-slip surface—a yoga mat or rubber bath mat keeps them from sliding, which reduces anxiety.
Close windows if outside noise is an issue. Some cats startle at lawn mowers or delivery trucks, and that spike of adrenaline can trigger a defensive scratch. I've also learned to silence my phone—nothing ruins the zen like a sudden notification buzz.
Temperature matters too. A warm room (70-75°F) keeps cats relaxed, while cold surfaces make them tense and less cooperative. If your bathroom has tile floors, lay down that towel or blanket first.
Step 3: Use the "One Paw at a Time" Approach for Anxious Cats
If your cat tolerates paw handling but still seems nervous about the clippers, break the task into micro-sessions. You don't need to trim all four paws in one sitting.
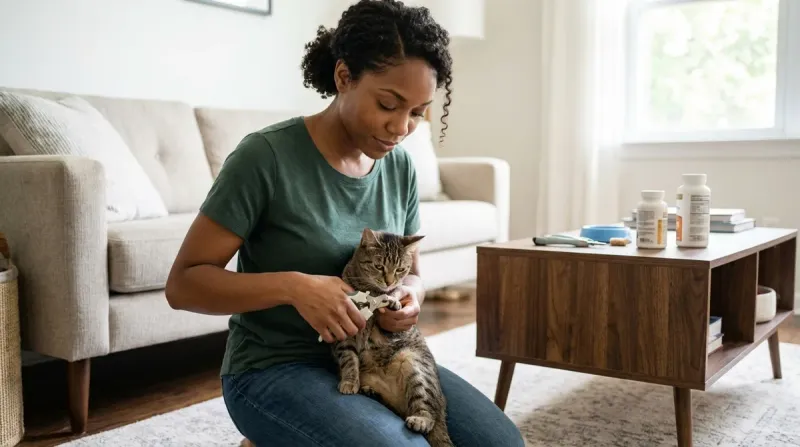
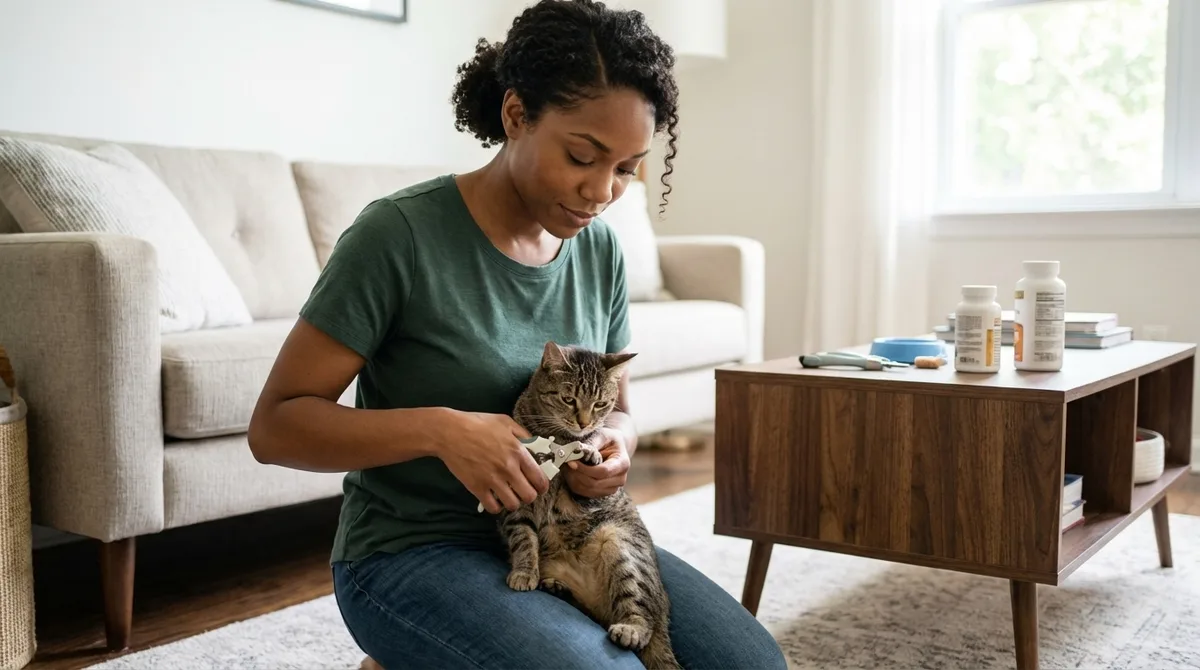
Start with just the front paws, which are easier to access and less sensitive than the back ones. Hold your cat in your lap facing away from you, with their back against your stomach. This position gives you control without making your cat feel pinned down face-to-face, which can trigger defensiveness.
Gently press one paw pad to extend the nails. Identify the quick—the pinkish vein visible through the nail on lighter-colored claws. On dark nails, you'll need to trim conservatively, cutting only the sharp, hooked tip. Trim 2-3mm below the quick at a 45-degree angle, removing just the pointed end.
Trim one or two nails, then release your cat with a treat and praise. Yes, really—just one or two. Come back an hour later (or the next day) and do two more. This incremental approach teaches your cat that nail trims are brief and not worth fighting.
I used this method on a rescue Siamese who'd been forcibly restrained during previous trims. The first session, I trimmed two nails on her right front paw. She walked away confused but not traumatized. By week three, she sat calmly for all four paws in a single five-minute session.
For kittens (8-16 weeks), this technique builds lifelong tolerance. For senior cats or those with arthritis, it reduces the physical strain of extended restraint. The How to Groom a Cat at Home: The Complete Guide for Stress-Free Grooming covers more about adapting techniques for different life stages.
Step 4: Master the Burrito Wrap for Squirmy Cats

Some cats simply won't hold still, no matter how patient you are. For these feline Houdinis, the burrito wrap (also called a towel wrap or scruffing alternative) provides gentle, non-threatening restraint.
Lay a large towel flat on your work surface. Place your cat in the center, facing away from you. Fold one side of the towel over their body, tucking it snugly under the opposite side. Then fold the other side over, creating a secure wrap that immobilizes their body but leaves the head free. Your cat should look like a fuzzy burrito with just their face poking out.
Pull out one paw at a time through the towel opening, trim the nails, then tuck it back in and extract the next paw. The constant gentle pressure of the towel has a calming effect similar to a Thundershirt for anxious dogs—it provides security rather than triggering panic.
Technique details matter. Don't wrap so tightly that your cat can't breathe or feels crushed—you want firm but gentle. Support their body weight with one arm while you work. If your cat starts open-mouth breathing, thrashing violently, or vocalizing in distress, unwrap immediately and try again later. Those are stress signals, not just annoyance.
I use this method for my neighbor's tabby, who's sweet but hyperactive. The wrap keeps her from spinning like a top while I work, and she actually purrs through most of it now. The key is pairing the wrap with treats during the conditioning phase, so your cat doesn't associate the towel with fear.
For cats with a history of aggressive behavior during grooming, consider a professional groomer or veterinary technician for the first few sessions. Some cats need feline-specific calming pheromone spray (Feliway) or even mild sedation prescribed by a vet for extreme cases.
Step 5: Try the "Lap Scratch" Distraction Method
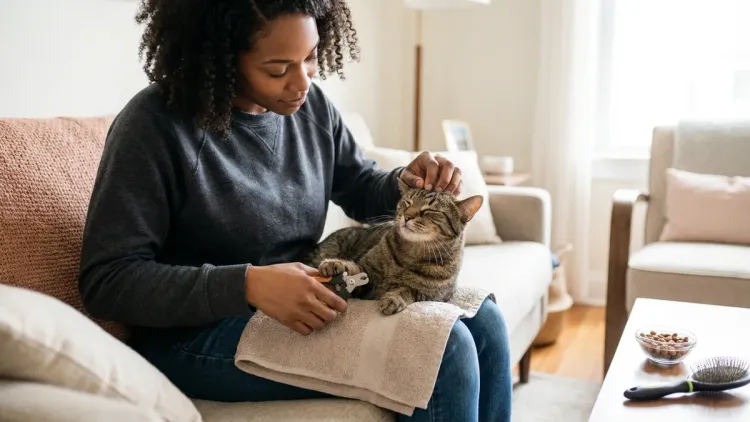
Here's a technique I stumbled onto by accident that works beautifully for food-motivated cats: the distraction trim.
Sit in a comfortable chair with your cat in your lap, facing away from you. Have a helper (or use a suction-cup lick mat stuck to a table at cat height) offer a continuous stream of wet food, squeeze-up treats, or tuna paste. While your cat is laser-focused on licking, quickly and quietly trim 3-4 nails.
The key word is quickly. You're not trying to sneak around—cats notice everything—but you're taking advantage of their divided attention. Most cats will tolerate quite a bit when a delicious reward is involved. I've trimmed all four paws on a particularly food-obsessed orange tabby in under three minutes using squeeze-up chicken treats.
This works best for cats who are already comfortable with paw handling (see Step 1) but just don't like holding still. It's less effective for truly fearful cats who won't eat during stressful situations.
Setup specifics: Position yourself so your cat's back is against your torso. Use your non-dominant hand to hold the paw and extend the nails, and your dominant hand to clip. Work in a smooth, continuous motion—hesitating gives your cat time to register what's happening and pull away.
Some cats will lick the treat happily for 30 seconds, then suddenly realize you're trimming nails and bolt. That's fine. You got a few nails done, which is progress. Repeat the process the next day until you've completed all paws.
Step 6: Learn to Recognize and Respect "Stop" Signals
Understanding feline body language is non-negotiable when learning how to trim cat nails without getting scratched. Cats give multiple warnings before they scratch—most people just miss them.
Watch for these escalating stress signals:
- Ear rotation: Ears swivel backward or flatten against the head
- Tail behavior: Thrashing, puffing up, or tucking tightly against the body
- Vocalization: Low growls, hissing, or a sudden silence if your cat was purring
- Pupil dilation: Pupils become large and black even in bright light
- Skin rippling: The skin along their back twitches or rolls
- Paw tensing: The paw becomes rigid or they actively try to retract it
- Attempted escape: Leaning away, twisting their body, or trying to push off your lap
When you see any of these, stop immediately. Put down the clippers, release the paw, and give your cat space. Pushing through these signals is how you lose trust and get scratched.
I learned this the hard way with my neighbor's Persian during our early sessions. He gave me the flattened ears and tail swish—classic warning signs—but I figured one more nail wouldn't hurt. Wrong. He caught my thumb with a warning swat (claws out) that taught me to respect his limits.
The brilliant thing about cats is they're honest communicators. If you stop when they ask, they learn they have control, which paradoxically makes them more cooperative over time. Forced restraint teaches them they need to fight harder.
For particularly sensitive cats, trim just one or two nails per session for the first month. Yes, it takes longer. But you're building a foundation of trust that lasts years. Compare that to the cat who spends the next decade hiding under the bed at the sight of nail clippers.
Step 7: Establish a Regular Trimming Schedule

Once you've successfully trimmed your cat's nails without injury (yours or theirs), the final step is making it routine. Indoor cats need nail trims every 2-4 weeks, depending on their activity level and scratching habits. Senior cats with reduced mobility may need more frequent trims, as they don't wear their nails down as effectively.
Mark your calendar or set a phone reminder. Consistency is crucial—the more regularly you trim, the less your cat stresses about it. Irregular sessions feel like surprises, which cats hate. Predictable routines feel safe.
I trim on the first Sunday of every month. My neighbor's cats now anticipate it (not enthusiastically, but without panic), and the actual trim takes maybe seven minutes across three cats. That's less time than brushing teeth.
Keep sessions short and positive. Even if you could technically trim all four paws in one go, splitting it across two sessions keeps your cat's stress low and cooperation high. Always end on a good note—if the last nail goes smoothly, stop there. Don't push for "just one more paw" and risk undoing your progress.
Between trims, provide appropriate scratching surfaces—sturdy posts, corrugated cardboard scratchers, or sisal mats—to help your cat naturally maintain their nails. The Best Cat Grooming Brush for Shedding: 9 Brushes That Really Remove Loose Fur discusses how regular grooming routines, including nail care, contribute to overall feline health and reduce stress.
For outdoor or indoor-outdoor cats, you may be able to extend the interval to 6-8 weeks, as they wear down their nails on natural surfaces. But still check monthly—overgrown nails can curl into paw pads, causing pain and infection.
Pro Tips & Common Mistakes
Pro tips from the grooming table:
- Use a headlamp or clip-on light if you're working alone. Seeing the quick clearly prevents accidental cuts, and you need both hands free.
- File after trimming. A quick pass with a nail file or cat-safe grinder smooths sharp edges that can catch on furniture (or your skin). Some cats tolerate filing better than clipping—experiment.
- Trim after a bath, if your cat tolerates bathing. Slightly softened nails cut more cleanly. The How Often Should You Bathe a Cat? The Truth About Feline Bath Frequency covers when and how to bathe cats safely.
- Keep sessions under 10 minutes total. Even cooperative cats have a tolerance limit. Going longer risks destroying the positive association you've built.
- Never trim nails as punishment or when you're frustrated. Cats read your emotions, and tension makes them defensive.
Common mistakes to avoid:
- Cutting too short: If you nick the quick, it bleeds and hurts. Apply styptic powder immediately and give your cat space. They'll forgive you, but try to avoid it—it sets back your training.
- Using dull clippers: Old or cheap clippers crush the nail instead of cutting cleanly, which is painful. Replace clippers annually or sharpen them if possible.
- Forcing the issue: If your cat is genuinely terrified after multiple conditioning sessions, consult your vet about gabapentin or other mild anti-anxiety medication for trimming days. Some cats have trauma histories that require pharmaceutical support.
- Trimming during high-stress periods: Moving houses, introducing a new pet, or during illness is not the time to push nail trims. Wait until life stabilizes.
Frequently Asked Questions
How often should I trim my cat's nails to prevent scratching damage?

Indoor cats typically need their nails trimmed every 2-4 weeks to prevent overgrowth and minimize damage to furniture and skin during play. Active cats who use scratching posts regularly may stretch this to 4-6 weeks, while senior or sedentary cats often need trims every 2-3 weeks because they don't wear their nails down naturally. Check your cat's nails weekly—if you can hear clicking on hard floors when they walk or if the nails are visibly curving, it's time for a trim.
What should I do if I accidentally cut the quick and my cat's nail bleeds?
Apply styptic powder, cornstarch, or baking soda directly to the bleeding nail and hold gentle pressure for 30-60 seconds until the bleeding stops. Keep your cat calm and confined to prevent them from running and reopening the wound. The bleeding should stop within a few minutes, but if it continues beyond 5-10 minutes or your cat seems distressed, contact your veterinarian. Don't attempt to trim more nails that session—end on a positive note with treats and try again in a few days after your cat has forgiven you.
Can I use human nail clippers on my cat?
Human nail clippers can work in a pinch for small cats or kittens, but they're not ideal because they're designed for flat human nails rather than the curved structure of cat claws. They tend to crush rather than cut cleanly, which can cause splitting or discomfort. Cat-specific scissor-style or guillotine clippers are specifically angled for feline nail anatomy and provide cleaner cuts with less pressure. If you're just starting out, invest in proper cat clippers—they're inexpensive (usually around $8-15) and make the process significantly easier for both you and your cat.
Why does my cat scratch me during nail trims even though I'm being gentle?
Cats scratch during nail trims due to fear, overstimulation, or feeling trapped rather than malice. Even gentle handling can trigger a defensive response if your cat hasn't been properly desensitized to paw touching, or if you're restraining them in a way that makes them feel pinned down. Watch for warning signs like flattened ears, tail thrashing, or dilated pupils, and stop immediately when you see them. If your cat consistently scratches despite gradual conditioning, try the burrito wrap method for secure but non-threatening restraint, or consider working with a professional groomer or veterinary technician to teach you handling techniques specific to your cat's temperament.
Summary

Learning how to trim cat nails without getting scratched isn't about overpowering your cat or moving so quickly they don't notice. It's about building trust through gradual desensitization, choosing optimal timing, and respecting their communication when they've had enough. The seven techniques I've shared—from paw conditioning and burrito wraps to distraction methods and stress signal recognition—give you multiple approaches to find what works for your cat's unique personality.
Start with 5-7 days of paw handling before introducing clippers. Work in quiet environments during your cat's naturally drowsy periods. Trim conservatively, stopping at the first sign of stress, and always end sessions with high-value treats. Consistency matters more than perfection—regular short sessions build cooperation faster than occasional wrestling matches.
Your cat's nails will need attention every 2-4 weeks for life. Make it a routine both of you can tolerate, and you'll protect your furniture, your skin, and most importantly, your relationship with your cat.