I'll never forget the first time I saw an axolotl in person at a local aquarium shop—those feathery gills, that perpetual smile, the way it just hovered there like some kind of underwater dragon. I was hooked instantly. But when I started researching axolotl tank setup, I realized these Mexican salamanders have very specific needs that differ wildly from tropical fish I'd kept for years. Get the water too warm, and you're looking at a stressed or sick animal. Skip the cycling process, and ammonia burns become a real threat to those delicate gills.
This guide walks you through everything I've learned about setting up a proper axolotl habitat, from choosing the right tank size to dialing in those critical water parameters. Whether you're a complete beginner to aquatic pets or an experienced fishkeeper branching into amphibians, you'll learn the step-by-step process to create a safe, thriving environment for these fascinating creatures. Plan for about 4-6 weeks total setup time to properly cycle the tank before adding your axolotl—patience here is absolutely essential.
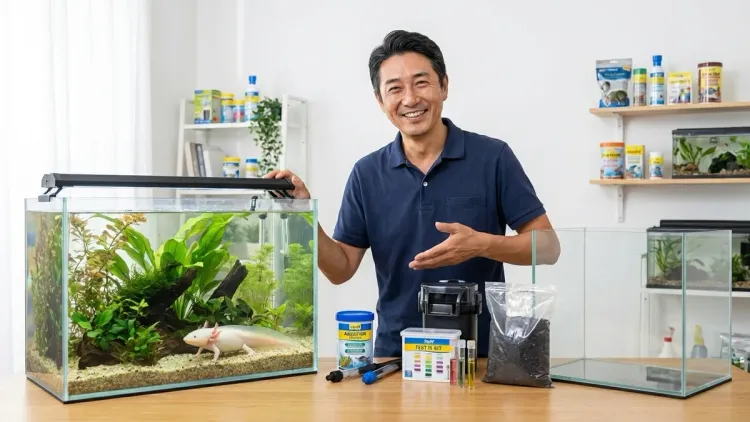
What You'll Need
Before you start your axolotl tank setup, gather these materials:
- Tank: Minimum 20-gallon long for one axolotl, 40-gallon for two
- Aquarium chiller or cooling fan: Essential for maintaining 60-64°F water temperature
- Filter: Canister filter or Aqueon QuietFlow Sponge Filter rated for your tank size
- Lid or glass canopy: Axolotls can jump when startled
- Substrate: Fine sand (grain size under 1mm) or bare-bottom setup
- Hide caves: 2-3 PVC pipes, terracotta pots, or aquarium-safe hides
- LED aquarium light: Low-intensity, preferably dimmable
- Water test kit: Liquid test kit for ammonia, nitrite, nitrate, and pH
- Dechlorinator: Seachem Prime or similar water conditioner
- Thermometer: Reliable digital or glass thermometer
- Turkey baster or gravel vacuum: For spot-cleaning waste
- Beneficial bacteria starter: Seachem Stability or Fritz TurboStart
- Optional plants: Java fern, anubias, or marimo moss balls (low-light, cold-tolerant species)
Step 1: Choose the Right Tank Size and Location
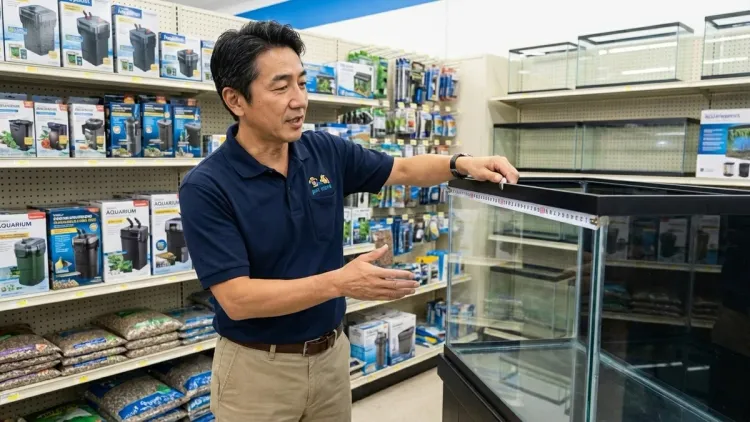
The absolute minimum for a single adult axolotl is a 20-gallon long aquarium (30" x 12" x 12"), but I honestly recommend starting with a 40-gallon breeder if you have the space. In my experience, bigger is always better with aquatic animals—it gives you more water volume to dilute waste, more stable parameters, and more room for your axolotl to explore and exercise.
Tank dimensions matter more than just gallons, though. Axolotls are bottom-dwellers that spend 90% of their time walking along the substrate, so floor space trumps height every time. A 20-gallon long provides 30 inches of horizontal space, while a standard 20-gallon high (24" x 12" x 16") offers less walking area despite the same volume. That extra length makes a real difference for their quality of life.
Place your tank somewhere that stays naturally cool and away from direct sunlight or heat sources like radiators or south-facing windows. I learned this the hard way when my first axolotl tank sat near a window—even with a chiller running, the afternoon sun would spike temperatures by 3-4 degrees, stressing my axolotl until I relocated the whole setup. Choose a sturdy stand that can support the full weight (a 40-gallon tank with substrate and décor weighs around 400-450 pounds when filled), and make sure you have access to electrical outlets for your equipment.
Temperature control is the single biggest challenge with axolotl keeping. These salamanders are native to cold mountain lakes in Mexico and require water between 60-64°F year-round, with 64°F being the absolute upper limit. Prolonged exposure to temperatures above 70°F can cause severe stress, immune suppression, and even death. Most homes stay warmer than this, so plan your budget accordingly—aquarium chillers run anywhere from $200-$600, while clip-on fans are a cheaper option ($30-$60) but less reliable in hot climates.
Step 2: Set Up Filtration That Won't Stress Your Axolotl
Filtration for an axolotl tank requires balancing two competing needs: strong biological filtration to handle their considerable waste output, and gentle water flow that won't buffet their delicate gills or stress them out. Axolotls produce more waste than most fish of equivalent size, so you need a filter rated for at least 3-4 times your actual tank volume. For a 40-gallon tank, I'd choose a filter rated for 120-150 gallons per hour turnover.
What I've found works best is either a canister filter with the output directed against the tank wall (to diffuse the flow), or a large sponge filter powered by an air pump. Sponge filters provide excellent biological filtration, they're nearly silent, and they create minimal current—perfect for axolotls. The downside is they're less aesthetically pleasing and require slightly more frequent cleaning. Canister filters offer more versatility and stronger mechanical filtration, but you'll need to baffle the output to prevent creating a current that exhausts your axolotl as it tries to swim.
Avoid hang-on-back (HOB) filters if possible. The waterfall effect they create disturbs the surface too much and can stress axolotls, though you can work around this by positioning the outflow against the back wall or adding a pre-filter sponge to slow the current. Whatever filter you choose, fill it with biological media like ceramic rings or bio-balls—these provide surface area for the beneficial bacteria that will process ammonia and nitrite in your cycling tank. If you're not familiar with the nitrogen cycle concept, I strongly recommend reading about the aquarium nitrogen cycle before continuing, since understanding this process is absolutely critical to keeping any aquatic animal healthy.
Install your filter but don't turn it on yet—we'll start it during the cycling process. Position the intake and output where they'll provide gentle circulation without creating strong currents in one area. I like to place the intake in one back corner and aim the output toward the front glass at a downward angle, which creates a gentle roll pattern across the bottom where axolotls spend their time.
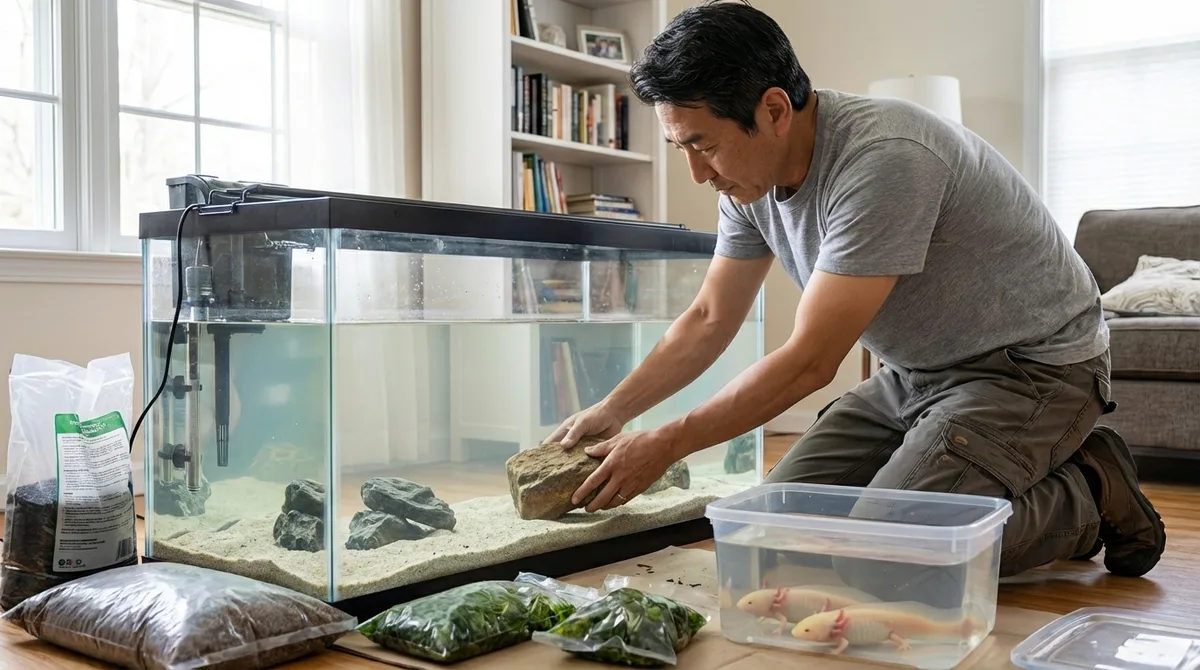
Step 3: Add Substrate or Go Bare-Bottom
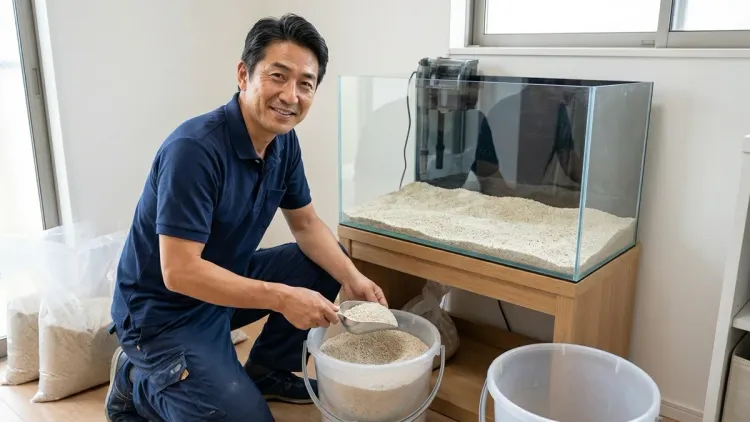
The substrate question in axolotl tank setup trips up a lot of new keepers, and for good reason—choose the wrong material, and you're risking potentially fatal intestinal impaction. Axolotls hunt by suction-feeding, hoovering up food along with whatever substrate happens to be nearby. If they ingest gravel sized between 2-10mm, it can lodge in their digestive tract and create a life-threatening blockage.
You have three safe options: fine sand (grain size under 1mm), large river rocks (too big to swallow, typically 2+ inches), or bare-bottom (no substrate at all). Each has trade-offs I've experienced firsthand.
Fine sand is my personal preference. It passes safely through their digestive system if ingested, provides a natural-looking substrate, and gives axolotls good traction for walking. The Caribsea Super Naturals Aquarium Sand works well—the grain size is fine enough to be safe but heavy enough that it doesn't cloud the water excessively. Rinse it thoroughly before adding 1-2 inches to your tank. The downside is waste settles on top rather than falling through, so you'll need to spot-clean more frequently with a turkey baster or siphon.
Large river rocks are safe but expensive to cover the bottom of a 40-gallon tank, and waste can get trapped between rocks where it's hard to clean. Bare-bottom tanks are the easiest to maintain and allow you to spot every bit of waste immediately, but they provide no grip for axolotls and can look pretty stark and clinical. Some keepers report their axolotls seem stressed on bare glass, constantly slipping as they try to walk, though others have no issues.
Whatever you choose, never use regular aquarium gravel. I've seen heartbreaking posts in axolotl forums from keepers who lost their animals to impaction from inappropriate substrate—it's one of the most preventable causes of death in captive axolotls.
Step 4: Dial In Water Parameters and Temperature Control
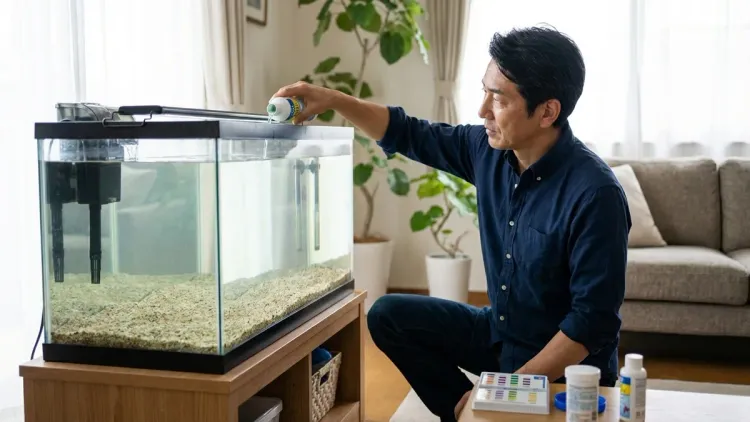
Now comes the technical part that makes or breaks your axolotl tank setup: getting the water chemistry and temperature right. Fill your tank with dechlorinated tap water, treating it with a water conditioner that neutralizes chlorine, chloramine, and heavy metals. I use Seachem Prime because it also temporarily detoxifies ammonia and nitrite, which is helpful during cycling.
Test your tap water parameters before adding it to the tank. Axolotls thrive in pH between 6.5-8.0 (they're fairly adaptable here), with 0 ppm ammonia, 0 ppm nitrite, and nitrates below 20 ppm. General hardness (GH) should fall between 7-14 dGH, and carbonate hardness (KH) between 3-8 dKH. Most municipal tap water falls within acceptable ranges, but if your pH is extreme or you're on well water, you may need to adjust parameters or use a water conditioner specifically designed to stabilize pH.
Temperature management is where things get expensive if you live in a warm climate. Install your aquarium chiller according to manufacturer instructions (this usually involves inline tubing connected to your filter) or set up clip-on fans to blow across the water surface. Monitor temperature religiously during the first week to ensure your cooling method maintains 60-64°F consistently. I check mine twice daily, once in the morning and once during the warmest part of the afternoon.
If you're using fans for evaporative cooling, be prepared to top off the tank frequently—I was adding a gallon or more per week to my 40-gallon when I ran dual fans during summer. Evaporative cooling also concentrates minerals and raises GH/KH over time, so you'll want to do partial water changes more frequently than with a chiller. Chillers are more expensive upfront but far more reliable and lower-maintenance in the long run, especially if your home regularly exceeds 75°F.
Don't add your axolotl yet. The tank needs to cycle first, which brings us to the next critical step.
Step 5: Cycle Your Tank Completely Before Adding an Axolotl
This is the step that tests every new keeper's patience, but it's absolutely non-negotiable. Cycling establishes colonies of beneficial bacteria that convert toxic ammonia (from waste and uneaten food) into slightly-less-toxic nitrite, and then into relatively harmless nitrate. Without these bacteria, ammonia and nitrite spike to lethal levels within days of adding an axolotl. I've covered this process in detail in my article about the aquarium setup fundamentals, but here's the specific approach for axolotl tanks.
Start by adding a source of ammonia to feed the bacteria as they establish. You can use pure ammonia from a hardware store (make sure it contains no surfactants, fragrances, or other additives—just ammonia and water), fish food (which breaks down into ammonia), or a commercial cycling product. Add enough to bring ammonia levels to 2-4 ppm, then dose beneficial bacteria starter according to package instructions.
Turn on your filter and any other equipment except the chiller or fans (no point cooling an empty tank for weeks). Test water daily for ammonia, nitrite, and nitrate using a liquid test kit—the strip tests aren't accurate enough for cycling monitoring. You'll see ammonia levels drop as nitrite appears, then nitrite will spike before nitrate starts climbing. The whole process typically takes 4-6 weeks at room temperature, though it runs slower in cold water.
Here's where axolotl tank setup differs from tropical fish: cold water slows bacterial growth significantly. Some keepers cycle at room temperature (70-75°F) to speed things up, then slowly lower temperature once the cycle completes. I tried this and it worked fine, but you need to reduce temperature gradually (no more than 2-3°F per day) to avoid crashing your bacterial colonies. The alternative is cycling at your target 60-64°F from the start, which takes 6-8 weeks but ensures your bacteria are adapted to cold conditions from day one.
Your tank is cycled when it can process 2 ppm ammonia to 0 ppm ammonia and 0 ppm nitrite within 24 hours, leaving only nitrate. Do a 50% water change to bring nitrate below 20 ppm, and your tank is finally ready for an axolotl.
Step 6: Add Decorations, Hides, and Plants
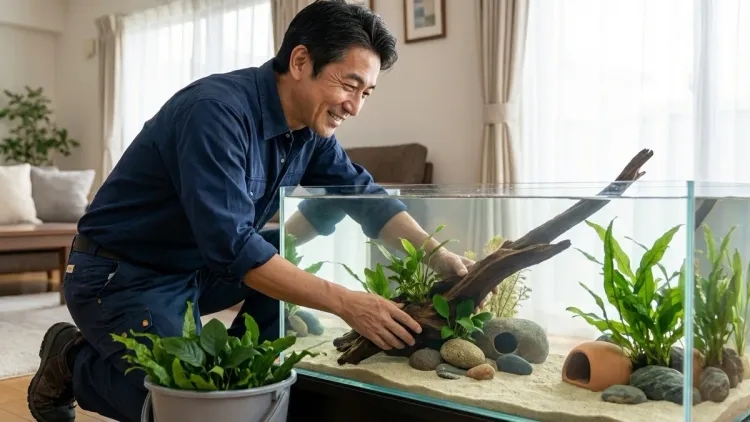
With cycling complete, it's time to make your tank feel like a home rather than a sterile box. Axolotls need multiple hiding spots where they can retreat when they feel exposed or stressed. In nature, they'd shelter under logs, rocks, and aquatic vegetation during daylight hours. PVC pipes (4-inch diameter, cut to 6-8 inch lengths) work perfectly and cost almost nothing at hardware stores. Just sand down any sharp edges before adding them to your tank.
Terracotta pots with the bottom broken out also make excellent hides—I've used these in every axolotl tank I've set up. You can find them at garden centers for a couple dollars each. Avoid decorations with small openings where an axolotl might get stuck, or anything with sharp edges or rough textures that could damage their delicate skin. Their skin is permeable and tears more easily than fish scales, so smooth surfaces are essential.
Live plants offer multiple benefits: they absorb nitrates, provide additional cover, and make the tank look more natural. The challenge is finding species that tolerate both cold water and low light, since bright lighting stresses axolotls. Java fern, anubias, and marimo moss balls are my go-to choices—all three thrive in 60-64°F water and low-light conditions. Attach java fern and anubias to rocks or driftwood using fishing line or super glue (yes, cyanoacrylate super glue is safe once cured), rather than burying the rhizome in substrate, which causes rot.
Avoid plants with delicate leaves or stems that an axolotl might damage while walking through them. I tried growing some Amazon swords in my first axolotl tank and watched my lotl bulldoze through them repeatedly until the plants looked like they'd been through a shredder. Stick with hardy, slow-growing species with tough leaves.
If you're not confident with live plants yet, artificial silk plants designed for aquariums work fine—just avoid plastic plants with sharp edges. Test any decoration by running a piece of pantyhose over it; if the material snags, it can damage axolotl skin.
Step 7: Acclimate and Introduce Your Axolotl
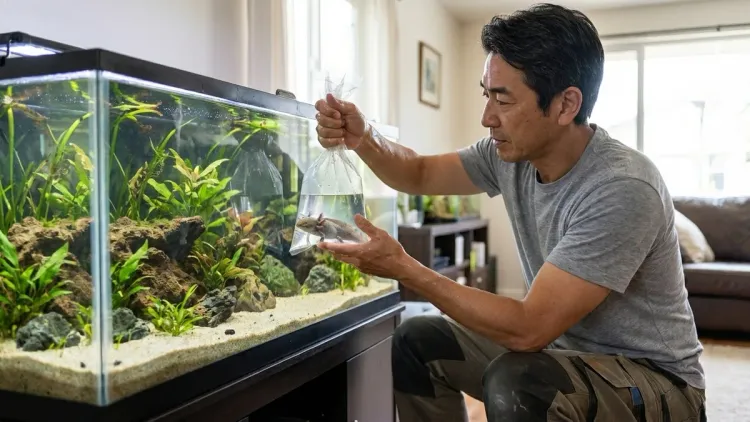
After weeks of preparation, you're finally ready to bring your axolotl home. Proper acclimation is crucial because sudden parameter changes can shock their system, even if the water in your tank is objectively better than what they came from. Temperature shock is especially dangerous with these cold-water amphibians.
Float the bag or container your axolotl arrived in for 15-20 minutes to equalize temperature, but don't let this go much longer than that if they shipped in a small volume of water—ammonia can build up quickly in confined spaces. Once temperatures match, begin the drip acclimation process: use airline tubing with a valve to drip water from your tank into their container at about 2-4 drips per second. Continue for 45-60 minutes until the water volume in their container has doubled.
Watch for signs of stress during acclimation—rapid gill fluttering, curled tail tip, or floating belly-up all indicate distress. If you see these, slow down the drip rate. When acclimation is complete, use a soft net or plastic container to transfer your axolotl into the tank, avoiding the water they arrived in (which may contain ammonia or contaminants).
Expect your axolotl to hide for the first day or two—this is completely normal. New surroundings are stressful, and they need time to explore and settle in. Keep the lights dim or off for the first 24 hours, and resist the urge to feed immediately. Wait until the following day to offer a small meal of earthworms, bloodworms, or axolotl pellets.
Monitor water parameters daily for the first week after adding your axolotl. Sometimes the bioload from a new animal causes a mini-cycle where you see small ammonia or nitrite spikes as your bacterial colonies adjust. If you detect any ammonia or nitrite, do an immediate 25-50% water change and test again in 12 hours. Once parameters stabilize at 0 ppm ammonia, 0 ppm nitrite, and under 20 ppm nitrate, you can drop to testing 2-3 times per week, then eventually weekly once your tank is fully mature.
Pro Tips & Common Mistakes
The biggest mistake I see with axolotl tank setup is underestimating the temperature challenge. A lot of new keepers figure they'll "see how it goes" with fans before investing in a chiller, then they're scrambling to buy cooling equipment in July when their tank hits 72°F and their axolotl stops eating. If you live anywhere that reaches 80°F+ during summer, budget for a chiller from day one—trying to cheap out here puts your animal's life at risk.
Another common pitfall is rushing the cycling process or skipping it entirely because you're excited to get your axolotl. I get it—waiting 6 weeks when you've already bought your tank and supplies feels like torture. But adding an axolotl to an uncycled tank means daily water changes for weeks while you cycle with them inside (called "fish-in cycling"), and even with perfect diligence, you're exposing them to ammonia and nitrite burns on their gills. There's just no good reason to risk it. Start cycling before you even buy your axolotl, and use the wait time to research their care, watch their behavior in videos, and learn to recognize signs of health versus stress.
What I've found works really well is keeping Indian almond leaves in the tank. They release beneficial tannins that have mild antibacterial and antifungal properties, and while the water takes on a slight tea color, it seems to reduce minor skin issues. Some hobbyists swear by them, others see no difference, but they definitely don't hurt anything.
Here's a pro tip I wish someone had told me: keep frozen water bottles on hand as an emergency cooling backup. If your chiller fails during a heatwave or you need to bring the temperature down quickly, float a couple frozen bottles in the tank (inside a plastic bag so melting ice doesn't dilute your water chemistry). This has saved my tanks more than once while waiting for equipment repairs.
Finally, don't panic if your axolotl occasionally floats to the surface or gulps air. They have primitive lungs and will sometimes supplement their gill respiration with surface breathing, especially if they've been active. It only becomes concerning if it happens constantly, which usually indicates water quality problems or temperature stress.
Frequently Asked Questions
What size tank does an axolotl need?
A single axolotl needs a minimum 20-gallon long aquarium (30" x 12" x 12") to provide adequate floor space, though a 40-gallon breeder is better and allows more stable water parameters. Add 10-15 gallons per additional axolotl, and prioritize horizontal swimming space over tank height since axolotls are bottom-dwelling amphibians that rarely swim to upper levels.
How cold does an axolotl tank need to be?
Axolotl tanks must maintain water temperature between 60-64°F consistently, with 64°F being the absolute maximum safe temperature. Prolonged exposure to temperatures above 68°F causes severe stress, immune suppression, and increased susceptibility to disease, while temperatures above 74°F can be fatal. Most keepers need an aquarium chiller or cooling fans to maintain appropriate temperatures year-round.
Can I put an axolotl in an uncycled tank?
You should never add an axolotl to an uncycled tank because without established beneficial bacteria, toxic ammonia and nitrite will spike to dangerous levels within 2-3 days and cause gill burns, stress, and potential death. Complete the nitrogen cycle first by dosing ammonia and monitoring water parameters for 4-6 weeks until the tank can process 2 ppm ammonia to 0 ppm ammonia and nitrite within 24 hours.
What substrate is safe for axolotls?
The only safe substrate options are fine sand with grain size under 1mm (which passes through their digestive system if accidentally ingested), large river rocks 2+ inches in diameter (too big to swallow), or bare-bottom tanks with no substrate. Never use regular aquarium gravel sized between 2-10mm because axolotls will ingest it during feeding and suffer potentially fatal intestinal impaction.
Summary
Setting up an axolotl tank properly requires more patience and planning than most tropical fish setups, but watching these prehistoric-looking salamanders thrive makes every bit of effort worthwhile. The key elements—spacious horizontal tank dimensions, reliable temperature control to maintain 60-64°F, thorough cycling before adding your animal, and appropriate substrate choices—all work together to create a safe environment where your axolotl can live for 10-15 years or more.
Take your time with each step, especially the cycling process, and don't cut corners on temperature control equipment. These cold-water amphibians have very little tolerance for heat, and failing to maintain proper temperatures is the single biggest cause of health problems in captive axolotls. If you've followed this guide and cycled your tank completely, you've already avoided the most common mistakes that plague new axolotl keepers.
Your axolotl tank setup is complete—now enjoy getting to know one of the aquarium hobby's most unique and endearing creatures.